


Last updated: October 22, 2026
Quick Overview
The E-Bike Riding Technique Training for Seniors teaches proper braking techniques, safe starting, and cornering on various surfaces. Through targeted training, you’ll gain confidence and ride longer, faster, and more safely through the Waldviertel countryside.
- Adjust the saddle height, handlebars, and brake levers to suit your individual needs before each ride
- Practice applying the brakes gently with both brakes at the same time, especially on gravel and forest roads
- Practice your balance, cornering, and starting in a series of consecutive exercises
- Register for classes early, as popular courses fill up quickly
- Drive regularly, at least twice a week, so you don't lose your driving skills
Table of Contents
- Why E-Bike Riding Technique Training Is Important for Seniors
- Preparing for an E-Bike Tour: What You Should Know Beforehand
- How to Brake an E-Bike Properly: Safety on All Surfaces
- Practicing Starting and Stopping on an E-Bike: Mastering the Basics
- E-Bike Riding Technique Exercises: Practical Training Steps
- Available Courses and Training Programs in the Waldviertel Region
- Avoiding Common Beginner Mistakes
- Frequently Asked Questions
Why E-Bike Riding Technique Training Is Important for Seniors
The E-Bike Riding Technique Training for Seniors It is not a luxury; it is the foundation for safe and confident cycling in old age. Fewer than two out of ten older e-bike riders report a high sense of safety, as a study on e-bike users shows. The problem isn't that e-bikes are unsafe; it's that many older adults have never learned how to handle the unique challenges these bikes present.
E-bikes ride differently than regular bikes. The motor assistance changes the weight, acceleration, and braking behavior. If you don't understand these differences, you'll ride with too much confidence and too little control. The result: crashes, fear, and lots of e-bikes ending up in the garage.
Many guests who visit the Waldviertel want to go on e-bike tours. But without proper riding technique, they end up staying at the hotel instead of exploring the forest trails and quiet roads that make this region so special.
This training changes that. With the right techniques, you'll gain confidence. You'll ride faster, safer, and for longer. And you'll get to experience the scenery you came here to see.
Preparing for an E-Bike Tour: What You Should Know Beforehand
Before you hop on an e-bike, three things need to be just right: the bike itself, your gear, and your body. Many beginners skip these steps and later wonder why riding feels strenuous or unsafe. The following adjustments and checks are specifically tailored to older riders—that is, people who prioritize comfort, stability, and safety over athletic performance.
Check Your Equipment and E-Bike Settings
An e-bike isn't just a bicycle with a motor. The weight distribution is different, the center of gravity is lower, and the braking power is stronger. Before you ride, you need to get to know the bike—and adjust it to fit your body.
Finding the Right Saddle Height
Stand next to the bike. The saddle should be about at hip level. Sit on the saddle and position the pedals so that one pedal is at the bottom of its stroke. Your leg should be slightly bent in this position—not fully extended, not sharply bent. A saddle that’s too low puts strain on your knees and saps your strength. A saddle that’s too high makes getting on and off the bike unsafe.
Adjust the Handlebars and Brake Levers
The handlebars should be adjusted so that you can reach them comfortably without hunching your back. The brake levers should be easy to reach without having to take your hand off the handlebars. On many e-bikes, the angle of the brake levers can be adjusted—take advantage of this if you have smaller hands or less strength in your fingers.
Choose the Support Level Carefully
Most e-bikes have three to five assistance levels. Beginners should start with the lowest or middle level. The motor helps you, but it doesn’t take control—you do. Using a high level when starting off can result in an unexpected jolt. Test the levels in an open area before hitting the road.
Check the brakes
Gently squeeze both brake levers. The braking action should be smooth and controllable. Check to see if the brakes are grinding or squeaking. With disc brakes, it’s worth taking a look at the pads—worn pads significantly increase the stopping distance.
Tires and Tire Pressure
Tires that are too soft can cause you to lose control, while tires that are too hard can be uncomfortable. The recommended pressure is usually listed on the sidewall of the tire. On forest trails, a slightly lower pressure is often more comfortable because it absorbs shocks.
Battery and Motor
Is the battery charged? Is the range sufficient for your planned trip? Battery performance decreases in cooler temperatures—be sure to allow for some extra range. Also, check to make sure the motor shifts smoothly and isn't making any unusual noises.
Personal Preparation and Safety Equipment
Wearing a helmet is non-negotiable. Period. A fall from an e-bike happens faster than one from a regular bike because the speeds are higher. When buying a helmet, look for one with good ventilation and an adjustable system that can be operated even with limited hand strength.
In addition to a helmet, you'll need:
- Gloves: They provide protection in the event of a fall and improve grip on the handlebars.
- Proper footwear: Sturdy shoes, no sandals. You need to have control over the pedals.
- Clothing that is visible: Bright colors or reflective elements, especially in the early morning or evening hours.
- Glasses: Protects your eyes from wind, insects, and the sun.
Wear comfortable clothing that won't get caught in the chain. Avoid pants that are too loose or long skirts. If you have back pain, wear a lightweight back support belt—it will give you extra stability.
Physical Preparation for Older Travelers
Riding technique doesn't start only once you're on the bike. Balance, reaction time, and agility can all be specifically trained—and that's exactly what makes the difference when things get tight in the woods.
Practicing Balance
Stand on one leg and hold the position for 20–30 seconds. Switch legs. This simple exercise strengthens the muscles you need for stopping and getting off. Practice it daily, preferably near a wall or a chair that you can hold onto.
Practice Your Reaction Skills
Respond consciously to everyday situations: Bounce a ball off the wall and catch it. Or practice stopping when you hear a sudden noise. It’s not about peak athletic performance, but about developing the habit of reacting quickly and in a controlled manner.
Mobility for Everyday Life
Stretch your neck, shoulders, and hips regularly. If you move more easily, you'll sit more comfortably on the bike and be able to get off more quickly if necessary.
Before every ride, do a quick warm-up: two minutes of light walking, a few shoulder circles, and three to five squats. That's enough to prepare your body for the ride.
Planning the Right Tour
Preparation doesn't end with the bike. Plan your route so that you can turn back at any time. For your first rides, choose short routes with familiar terrain. Avoid steep descents and narrow forest trails as long as you feel unsure. And take breaks—not only when your concentration starts to wane, but before that happens.
A common mistake is planning your first ride to be too long. Fatigue reduces your reaction time—and that’s exactly when crashes happen. It’s better to plan a shorter ride and call it quits if you notice your concentration starting to wane.
How to Brake an E-Bike Properly: Safety on All Surfaces
Braking is the most important riding technique. If you brake incorrectly, you’ll lose control, skid, or fly over the handlebars. If you brake correctly, you’ll ride comfortably even on difficult terrain.
Understanding Braking Methods and Applying the Right Amount of Braking Force
Most modern e-bikes have two types of brakes: disc brakes in the front and rear. Some still have rim brakes. Each type of brake behaves differently.
Disc brakes are durable and weather-resistant. They work even in wet and muddy conditions. The lever responds immediately to pressure; the harder you press, the harder the bike brakes.
Here's the key point: Many beginners brake with full force. That's wrong. If you brake with full force, the wheels lock up and you skid. Instead:
- Press the right lever (rear brake) first, and do so gently.
- Follow through with the left lever (front brake).
- Increase the pressure gradually, not all at once.
- Let go before you come to a stop.
This technique is called Controlled Braking. It gives you control and prevents blockages.
Braking on forest trails and gravel roads
Forest trails are unpaved. The ground is loose, slippery, and unpredictable. Regular braking doesn't work here.
On gravel and forest trails:
- Brake earlier than you would on the road; the stopping distance is longer.
- Apply only gentle braking force. Hard braking on loose surfaces can cause the tires to spin.
- Distribute the braking force evenly between the front and rear.
- If you notice that the front wheel is starting to slip, let go immediately and shift your weight backward.
Here's a handy tip: On very loose terrain, brake mainly with the rear wheel. Keep the front wheel light—that way, it won't slip as easily.
A common mistake is to use only one brake. This leads to uneven braking performance and a loss of control. Always use both brakes together.
Practicing Starting and Stopping on an E-Bike: Mastering the Basics
Starting and stopping are the movements you make most often. They are also the moments that beginners fear the most, because they require both balance and strength.
Gradual Start-up Technique for Greater Stability
Many older adults are afraid of getting started. That’s understandable. An e-bike weighs 25–30 kg. The motor assistance kicks in suddenly. If you don’t start off properly, the bike can slip out from under you.
Here's how to drive safely:
- Stand over the wheel. Both feet are touching the ground.
- Sit on the saddle. Hold the handlebars firmly with both hands.
- Press a pedal to the 2 o'clock position (top right).
- Push off with that leg. At the same time, push down hard on the pedals.
- The motor helps. But you provide the power; the motor just amplifies it.
- Start off in a straight line. Look ahead, not down.
The most important thing: Pedal with force. Many beginners pedal too weakly. They hope the engine will do all the work. That doesn't work. You and the engine have to work together.
Practice Stopping and Getting Off Safely
Stopping is easy if you do it right. If you do it wrong, you'll fall over.
Stopping Safely:
- Brake gently using both brakes at the same time.
- Slow down to walking speed.
- When the bike has almost come to a stop, put one foot on the ground.
- Hold on to the handlebars.
- Get off the bike by swinging your leg over the saddle; don't jump.
A common mistake: Braking too quickly and then trying to put a foot down. That won't work. You're going too fast. Your leg won't reach. You'll fall.
Practice this sequence 10 times before you head out onto real trails. It'll become second nature.
E-Bike Riding Technique Exercises: Practical Training Steps
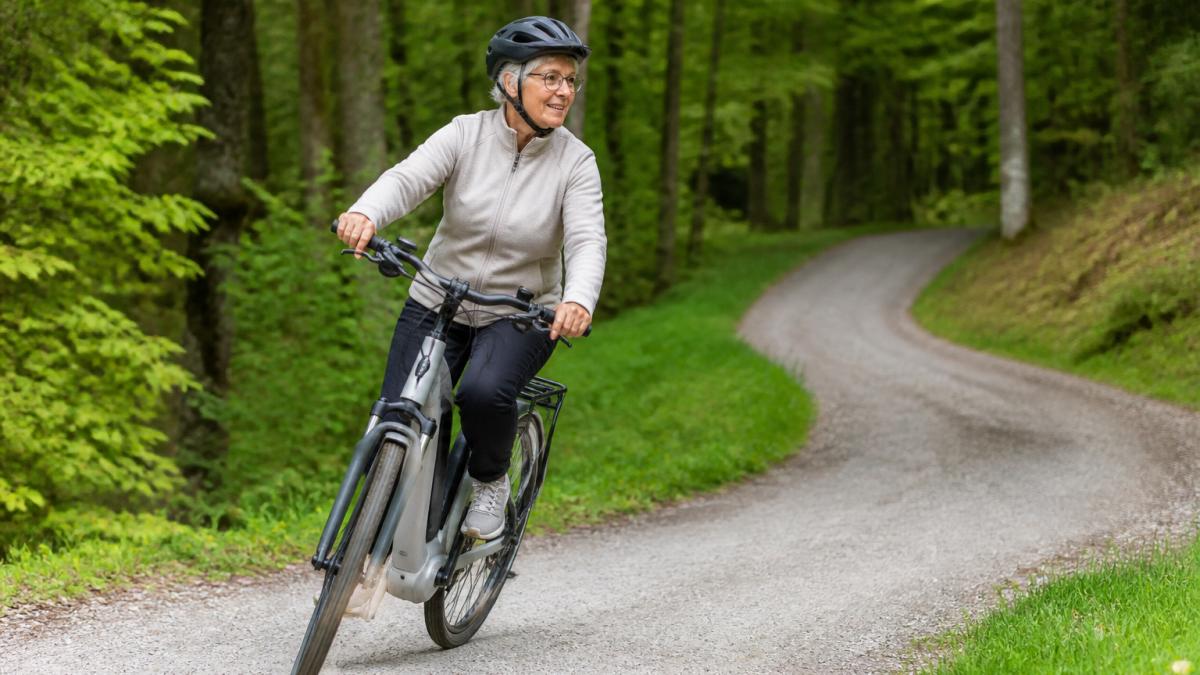
That's the core of the training. Theory is important, but practice is what counts. These exercises build on one another. Do them in this order.
Practice Balance and Cornering
Many crashes happen on curves. Not because the curve is too tight, but because drivers are going too fast or don't know how to navigate a curve.
Exercise 1: Riding in a Straight Line (10 minutes)
- Ride on a flat, wide road or a wide forest trail.
- No curves, no obstacles.
- Ride with low motor assistance.
- Focus on driving straight ahead. Keep your eyes 5–10 meters ahead of you.
- Goal: You'll ride safely and without wobbling.
Exercise 2: Gentle Curves (15 minutes)
- Find a spot with gentle curves—a park or a wide forest road.
- Enter the curve slowly.
- Lean slightly into the turn—not too much, not too little.
- The outer foot remains on the lower pedal. The inner foot is on the upper pedal.
- Drive through several curves in a row.
- Goal: You will navigate curves safely and in a controlled manner.
Exercise 3: Tighter Turns (20 minutes)
- Now you're taking sharper turns.
- Slow down before the curve.
- Lean more into the turn.
- Goal: You will be able to navigate tight turns safely.
Practice driving on different surfaces
The Waldviertel has many different types of trails. Paved, gravel, forest trails, grass—each surface requires different techniques.
Exercise 4: Gravel and Forest Trails (20 minutes)
- Find a wide forest path or a gravel road.
- Start off slowly, no faster than walking speed.
- See how the bike handles. Is it slippery? Does it bounce?
- Increase the speed slowly.
- Brake gently. Can you feel the difference compared to asphalt?
- Objective: You will ride safely on loose terrain.
Exercise 5: Training on a Slope (15 minutes)
- Find a gentle slope—not too steep.
- Drive downhill. The engine does not assist with braking; you must brake yourself.
- Brake gently and steadily.
- Goal: You will ride down hills safely without going too fast.
Practice these techniques several times a week, not just once. Riding technique becomes second nature through repetition. After 10–15 practice rides, these movements will become reflexes.
Available Courses and Training Programs in the Waldviertel Region
The E-Bike Riding Technique Training for Seniors It’s no longer just a niche activity. There’s a growing number of options in the region—from one-day introductory courses to training weekends lasting several days. If you search specifically, you’ll find the right programs. If you simply search for „e-bike course“ in general, you’ll often end up with providers outside the region or with dates that are already fully booked. That’s why it’s worth comparing the options in a structured way.
Where to Find Specific Training Programs
The following sources are the most reliable for current exchange rates in the region:
- Tourism associations in the region: Regional tourism associations compile a list of available courses and publish them seasonally on their websites. Be sure to ask specifically for „e-bike riding technique training“ and for dates for people age 50 and older.
- Bicycle Dealers and Specialized Repair Shops: Many local retailers offer courses in collaboration with certified instructors or can put you in touch with them. Calling the store directly is often more productive than searching online.
- Communities and Healthy Communities: Some municipalities organize free or heavily subsidized introductory classes as part of health and fitness programs. These programs are usually announced in the spring.
- Statewide Safety Programs: Initiatives such as „Sicheres Vorarlberg“ or the E-Bike Safety Tour demonstrate how such programs are structured—even if they aren’t held in every region, they provide a good overview of the format and content.
- Senior Citizens' Associations and Retirees' Organizations: They regularly organize group classes and know instructors who specialize in working with older travelers.
A Comparison of Course Formats
Not every course is suitable for every learning level. The following overview will help you choose:
| Course Format | Duration | Typical Content | Suitable for |
|---|---|---|---|
| Introductory Course | 2–3 hours | Braking, Accelerating, First Turns | Beginners and those returning to the sport |
| Daily Rate | 4–6 hours | Theory and practice on various surfaces | Riders with basic skills |
| Weekend Training | 2 days | Intensive training, including downhill sections and forest trails | Drivers who want to improve their safety |
| Group Class for Seniors | 3–4 hours | Appropriate pace, balance, safety in daily life | People aged 50 or 65 and older |
| One-on-One Coaching | 1–2 hours | Individual weaknesses, personalized feedback | Travelers with special needs |
Most providers limit class sizes to 8–15 participants. This limit is intentional: it’s the only way the instructor can observe and correct each participant individually. With larger groups, the quality of individual feedback suffers.
Free and Subsidized Programs
Many programs for older cyclists are free or heavily subsidized. The E-Bike Safety Tour 2025 in Upper Austria offered free training sessions for people aged 50 and older, as reported by schongenial.at. Such initiatives usually focus on practical exercises involving braking, cornering, and shifting gears. „Sicheres Vorarlberg“ also offers courses focused on driving techniques and traffic safety, which are often free or heavily subsidized.
In this region, be sure to ask your local municipality, tourism board, and senior citizens' organization about funding programs. Many municipalities support exercise and safety programs for older adults without widely publicizing them.
Registration and Practical Questions
Register early—popular courses fill up quickly. When registering, please clarify the following points:
- Course duration: Usually 3–4 hours; for day-long courses, it's correspondingly longer.
- Course Dates: Often in the spring and fall, when the weather is mild.
- Included Services: Are rental bikes available? Does the provider offer helmets or other equipment? Is insurance included?
- Target audience: Are there specific sessions for beginners and those switching to this sport? Are older riders accommodated?
- Group size: What is the maximum number of participants?
- Coach Certification: Is the trainer certified and experienced in working with seniors?
If you're staying at Ferienwohnungen Gutenbrunn, you can book classes before or after your stay.
When you sign up, call directly and ask for a trial session. Many providers let interested students observe a class first—that way, you can see if the pace and tone match your own learning style.
Avoiding Common Beginner Mistakes
We see these mistakes time and time again. If you're aware of them, you can avoid them.
Mistake 1: Driving too fast
Beginners tend to ride faster than they can control. The engine helps, and suddenly you're going faster than ever before. That's dangerous. Ride at a speed that allows you to stop safely at any time.
Mistake 2: Starting with full motor assistance
The motor has several levels. Beginners tend to select the highest level right away. That's a mistake. You'll lose control of your speed. Start with low or medium assistance. Only increase the level once you're riding safely.
Mistake 3: Not using both brakes
One brake isn't enough. You need both—front and rear—for safe control. Practice using both brakes at the same time.
Mistake 4: Taking too long of a break between workouts
It's easy to lose your riding skills. If you don't ride for three weeks, you'll be a beginner again. Ride regularly—at least twice a week.
Mistake 5: Riding without a helmet
That's not just a mistake—it's life-threatening. A helmet isn't optional. It's required.
| Error | Episode | Solution |
|---|---|---|
| Speeding | Loss of Control in Curves | Start slowly, then pick up the pace |
| Full motor assistance | Unexpected Acceleration | Select the low setting |
| Just one brake | Uneven Braking | Apply both brakes |
| Long breaks | Unlearning Techniques | Drive regularly |
| No helmet | Severe head injuries | Always wear a helmet |
You can ride an e-bike safely and confidently with the right riding technique and regular practice. The Waldviertel offers the perfect setting: quiet forest trails, rolling hills, and breathtaking natural scenery. At Ferienwohnungen Gutenbrunn, you can relax after your ride, put your feet up, and reflect on the day. Our accessible apartments are designed so that you can truly unwind, with personalized care from Anna and Herbert. Book directly with us and combine your training weekend with genuine relaxation in nature.
Frequently Asked Questions
How long should an e-bike riding skills training session for seniors last?
An effective e-bike riding technique training session for seniors should last at least 2–3 hours to practice the basics, such as braking, starting, and cornering. Many courses in the Waldviertel offer multi-part training sessions spread over several days to allow sufficient time for hands-on practice and repetition. Start with shorter sessions and gradually increase the duration based on your fitness level and progress.
Which riding technique exercises are most helpful for e-bike beginners?
The most important riding technique exercises are: practicing balance on flat ground, braking exercises with varying levels of force, starting off without dismounting, riding around curves at moderate speeds, and riding on different surfaces such as forest trails and gravel. A study on physical activity shows that e-bikes are an effective way to increase physical activity; targeted training significantly boosts confidence and safety.
How do you prepare for an e-bike tour on forest trails?
Before going on an e-bike ride on forest trails, you should thoroughly check your e-bike (tires, brakes, gears), wear appropriate clothing and a helmet, bring enough water, and plan your route in advance. Start with easier trails and gradually increase the difficulty. Practice braking on gravel and downhill sections beforehand to ensure your safety on the trail.
What protective gear is recommended for e-bike training?
A well-fitting helmet is the most important piece of protective gear and should always be worn. We also recommend gloves for better grip and protection, sturdy shoes with good traction, bright or reflective clothing for visibility, and, if necessary, elbow and knee pads. High-quality gear plays a key role in boosting your confidence and safety while riding an e-bike.



Comments are closed, but trackbacks and pingbacks are open.